Reason to Create Client Dashboard in WordPress
Being a WordPress expert, you will find clients that are not familiar with WordPress. They have no coding skills with CSS, HTML or WordPress language.
While making a custom dashboard for user or client, you may deliver them with a trim user-interface and increased functionality. It is going to enhance client pleasure which helps to bring more work. It will save your time because your clients will need very rare help. Let’s analyze on how to quickly create a client dashboard in WordPress. I will move you via various methods in here. You can choose how you need to personalize based on your client’s demands.
Step # 1 – Hide Admin menus That Are Not Important
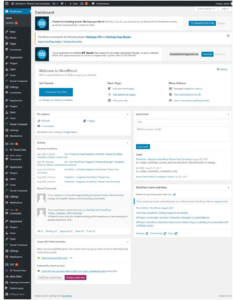
You can work with various wp plugins, Download WordPress Themes free, custom post types or many resources when making a website for your clients. Most of these resources will include their personal menu products in the WordPress dashboard. It will also generate many widgets in the main Dashboard panel, and bring links to the site. As an outcome seems a bit unpleasant.
Those clients who have not worked with WordPress these extra things create the dashboard more challenging.
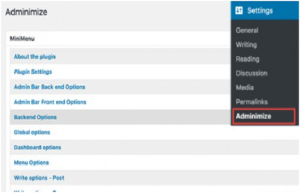
Let’s get started creating a client dashboard by cleaning the mess. For doing that you’ll have to download and then activate the plugin Adminimize. After activating this plugin, go to Settings -> Adminimize page to set up this plugin.
You will find several admin areas from the settings page. Pressing an area will grow it, and you’ll have a choice with the selections for this specific part.
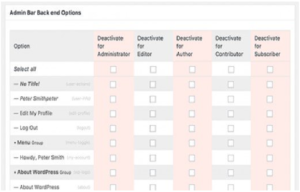
You will be capable of showing or disguise something outlined under an area for various tasks. Test every item before concealing it as this can impact on your client’s power to work with their site.
You may also like: How to Create Your Own WordPress Blog
Step # 2 – WordPress Dashboard as White Label
The Adminimize plugin covers many solutions to manage the look of your WordPress dashboard panel. Even so, it doesn’t have possibilities to disguise the branding WordPress and white labels in the admin dashboard. White labels consist of changing the logo of WordPress by a custom logo, modifying the footer admin section, display or hide objects from menus and more.
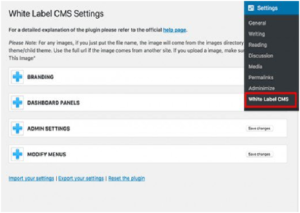
Initially, you need to download and activate the plugin for White Label Content management system. After activating this plugin, go to Settings -> White Label CMS page to manage plugin configurations.
The configurations page is split into various parts. You are able to press on a segment to flourish and look at its options. Many selections in this plugin are also offered in Adminimize plugin. If you have disguised those selections before, you’ll be able to bypass them. For a detailed explanation and support of the plugin, you can refer to the official page.
Step # 3 – Changing The Look of WordPress Dashboard
WordPress includes a couple of admin colors that people can adjust using their profiles. You are able to put one color as normal or default for first-time customers. You can even make a custom color plan for yourself.
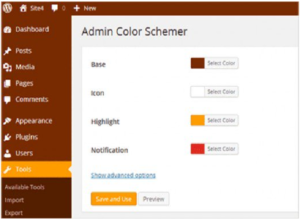
To another level download WordPress admin themes. You can find these WordPress themes as plugins that you will be able to install to improve the look of admin area of WordPress.
Step # 4 – Put Beneficial Options in creating Client Dashboard
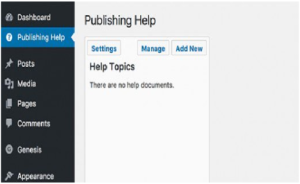
While providing projects for your clients, you’ll see that lots of them have related inquiries. Including a support or reference area in WordPress, client dashboard will enable your solution to those concerns and save your time used in offering help. The easiest way to include a support part is by installing and activating the WordPress Support plugin. After activating the plugin, it will include a new ‘Posting Support’ menu item in the admin bar of WordPress. Pressing on you will be access to setting page.
The area shown in the below image will be empty because you have not built any support options still. Don’t wait and press the ‘Add New’ button to build one.
You can also make your support or help document such as you would make a WordPress post or page.
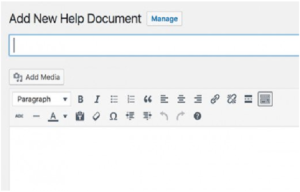
WordPress Help plugin works by using custom post type for documents, and they are ordered like pages. You can also make child documents or parent and to get them organized.
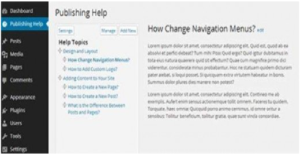
Moreover, you can also synchronize documents from a different WordPress website. This enables you to work with the similar documentation for all your client projects.
Step # 5 – Creating Widgets as Custom Dashboard
Dashboard widgets are the first elements users look at when they log into the admin area of WordPress. This will be the finest place to point your clients to the perfect path by including your personal custom dashboard widgets. The following is a basic widget code of dashboard which you can use for a starting place. You’ll have to put this code in functions.php file of your theme or in a plugin site specific.
add_action(‘wp_dashboard_setup’, ‘my_custom_dashboard_widgets’);
function my_custom_dashboard_widgets() {
global $wp_meta_boxes;
wp_add_dashboard_widget(‘custom_help_widget’, ‘Theme Support’, ‘custom_dashboard_help’);
}
function custom_dashboard_help() {
// Content you want to show inside the widget
echo ‘
Welcome to Custom Blog Theme! Need help? Contact the developer here. For Hubpages: Website_name
‘;
}
Recommended for you: Knowing These 6 Secrets Will Make Your WordPress Website Design Look Amazing